If a bite taking is finished, well, let's do a mount.
Before that.
After the polymerization, we do a remount by the split cast mount method and an occusal equilibration must be done again.
Therefore, modify it to the split
cast mount method model.
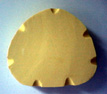
I tried it variously, A V-shaped groove was dug, and a magnet was used, and it tried to put a slope.
But, the next method is the best of that.
Put a groove quickly by the stamp bar. Then, make it a tapered form by the paper point at the end.
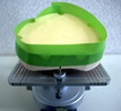
If a model is modified to the split cast mount method.
Well, let's mount.
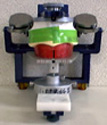
As for the reference plane as well,
Fundamentally, there is necessity for
the condition which an Articulator is presumed from the front to be
the same as the condition which a patient is presumed from the
front.
A patient's median-sadittal-plane corresponds to the median line of
the Articulator, and the reference plane when a patient is seen from
the side mounts in the middle of the Articulator.
This condition becomes the first step with inside the mouth which a
dentist is examining and the working model which a technician is
watching in the environment which it is the same as.
Next time, let's mount.
Fit the upper jaw model to the Bonwill's triangle of the Articulator on the template, and put it because there is necessity to mount for the Camper's line which it got from the patient so that to become parallel. (in the case of the Articulator of reference of the Camper's line)
On that occasion, let's try not to forget to confirm that the median line of an occusal rim and the model correspond to the median line of the Articulator.

If confirmation is finished. It mounts the upper jaw model. Then, it mounts the lower jaw model.
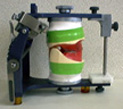
Up-down occusal rims will try never to stick.
Because, it can't transfer the Camper's line taken all the way any more on the Articulator.